Unzip files to your website. Requirements:
Set asset base folder and asset base virtual in config.php.
    //asset base - local path, ***NO TRAILING SLASH***
    define("XF_ASSET_BASE", 'D:\mywebsite\assets\images');

    //asset base - virtual path, for displaying on page or link
    //use relative to website root path (starts with slash - /).

    define("XF_ASSET_BASE_VIRTUAL", '/assets/images');
You can configure other options in config.php if needed.
Include scripts files in your page:
    <script src="path-to/jquery-1.9.1.min.js" type="text/javascript"></script>
    <script src="path-to/xprofile_lang.js" type="text/javascript"></script>
    <script src="path-to/xprofiledialog.js" type="text/javascript"></script>

    <link rel="stylesheet" href="path-to/css/xprofiledialog.css" />
    <input id="filename" type="text" size="40" value="" />
    <input type="button" class='file-select-button' data-target-input='filename' value="Select" />

    jQuery(document).ready(function() {
        jQuery(".file-select-button").xproFileDialog( {} );
    });
Integrate InnovaStudio Asset Manager to ContentBuilder to select image or file from server (requires ContentBuilder v1.8.3 or newer).
$("#contentarea").contentbuilder({
snippetFile: 'assets/default/snippets.html',
onImageSelectClick: function(selEv) {
dlg = new XPROFileDialog({
url: "pathto/assetmain.php",
onSelect: function(data) {
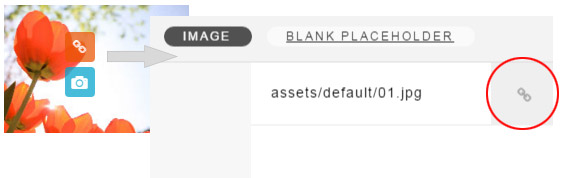
var inp = jQuery(selEv.targetInput).val(data.url);
}
});
dlg.open();
},
onFileSelectClick: function(selEv) {
dlg = new XPROFileDialog({
url: "pathto/assetmain.php",
onSelect: function(data) {
var inp = jQuery(selEv.targetInput).val(data.url);
}
});
dlg.open();
},
toolbar: 'left'
});
    <div id="selFileName" style="padding: 6px;">No file selected</div>
    <p><input type="button" id="selectFile" value="Select" /></p>

    jQuery("#selectFile").xproFileDialog({
        url : "assetmain.php", //this is default (you can omit this)
        onSelect: function(data) {
            jQuery("#selFileName").html(data.url);
        }
    });
    var manager = new XPROFileDialog({
        url: "assetmain.php"
        onSelect: function(data) {
            alert(data.url);
        }
    });

    manager.open();
In assetmain.php, asset manager initialization:
XPROFile.maxSize = 2000000; //in byte
In assetmain.php, asset manager initialization:
    XPROFile.allowedTypes = ["jpg", "png", "gif", "txt", "jpeg", "zip", "pdf", "doc", "docx"];

    //to allow all: XPROFile.allowedTypes = ["*"];
In assetmain.php, asset manager initialization
XPROFile.readonly = true;
In assetmain.php, asset manager initialization
XPROFile.allowDelete = true;
In assetmain.php, asset manager initialization
XPROFile.allowRename = true;
In assetmain.php, asset manager initialization
XPROFile.allowEdit = true;
Set language code in config.php, for example
define("XF_LANGUAGE", "dk-DK");
Copy the English version of language file located in server/i18n-en-US.txt, rename to i18n-dk-DK.txt and translate.
In xprofile_lang.js, create a new object and copy all the words from English version and translate.
    var XPROFileI18N_DK = {
    ...
    ...
    };
Then set the object as second argument in the following line in xprofile_lang.js:
var _XFI18n = jQuery.extend(XPROFileI18n_EN, XPROFileI18N_DK);